注释和文档是程序的重要组成部分,使用 Doxygen 可以自动将程序中特定格式的注释提取出来,生成一份很漂亮的参考文档。这样只要在编程的时候遵循特定的格式书写注释,程序编好后文档也就自动完成了,不需要专门花时间来写文档,这无疑减少了很多的工作量。
Doxygen支持的语言有很多,常用的有C/C++、Java、Python等;可以生成的文档格式也很丰富,其中以HTML格式和Latex格式最为常用。
关于Doxygen的安装和使用,可参考其官方 参考手册, 这个参考手册本身也是使用Doxygen生成的。网上也可找到很多基础教程,在此不再累述。本文主要介绍在使用C语言编程时该如何写注释,以便使用Doxygen自动生成高质量的文档。
下面以STM32F0系列单片机的标准库(Standard Peripheral Library)中的ADC模块为例进行分析,这是ST公司为其F0系列单片机提供的驱动库文件,注释的书写十分标准,很适合进行学习模仿。
定义功能模块
STM32F0xx_StdPeriph_Driver是按照功能模块进行组织的,每个功能模块有其对应的头文件与源文件。功能模块列表如下: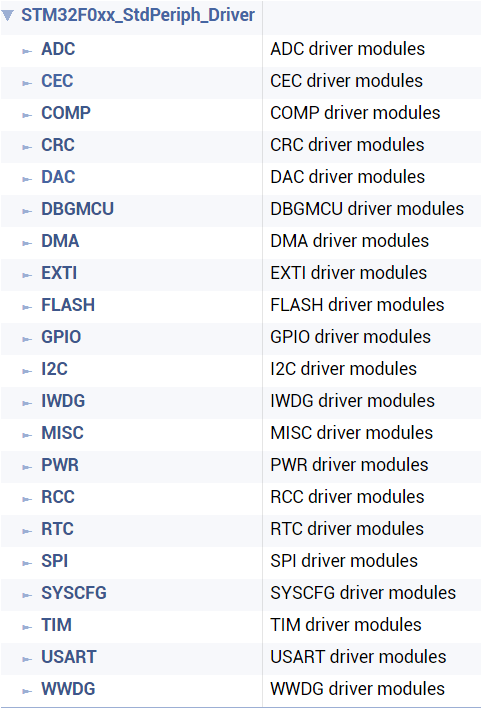
为了让Doxygen能正确提取模块定义,需添加模块定义注释。在文件中加入:
1 | /** @addtogroup ADC |
使用@brief对本模块的主要功能进行说明,如需进行更详细的说明,可使用@details。
定义宏定义子模块
定义了功能模块后,一般还将宏定义单独定义为一个子模块,宏定义一般放在头文件中,加入以下注释:
1 | /** @defgroup ADC_Exported_Constants |
以上代码段中定义了一个名为ADC_Exported_Constants的模块,此模块包含了ADC模块中所有的宏定义。在ADC_Exported_Constants模块中,又有若干个子模块,如ADC_JitterOff,ADC_Resolution等。它们的关系可以参考下图: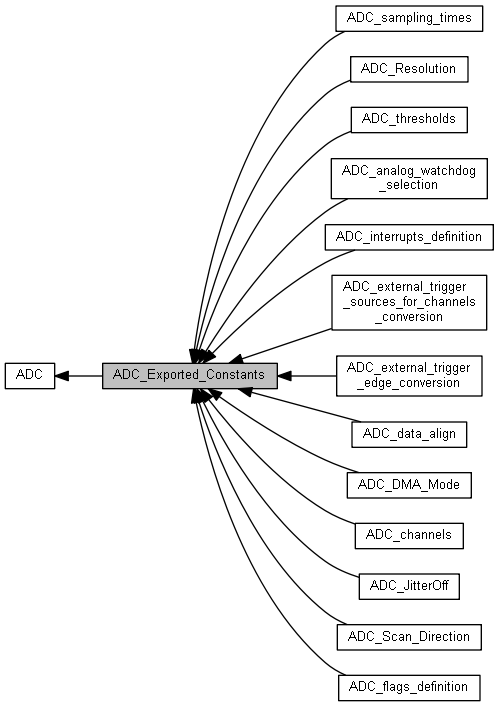
这样组织代码可以让大的量宏定义结构更为清晰,而且有利于在其它地方进行交叉引用。
定义函数子模块
与宏定义子模块类似,也可以将函数定义为一个子模块,并且按功能进行进一步分组归类。函数的定义与注释说明一般都全部放在源文件中,头文件中仅简单的进行函数声明。在源文件中加入以下注释:
1 | /** @defgroup ADC_Private_Functions |
以上代码在实际代码的基础上进行了精简,仅保留了进行模块定义的基本结构。代码段中定义了一个名为ADC_Private_Functions的模块,此模块中包含了所有的函数定义,并且各函数按用途进行了分组,分为了若干个子模块,如Initialization and Configuration functions,Power saving functions等。关系示意图如下: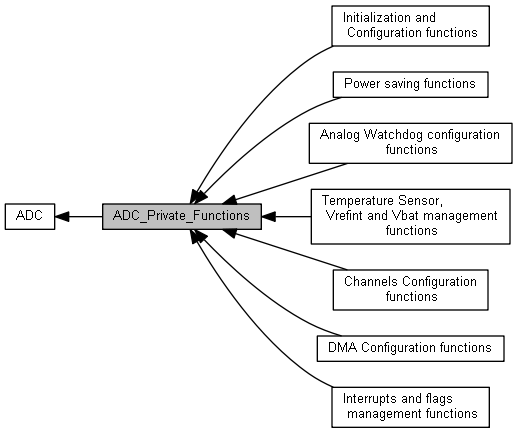
结构体注释说明
对于结构体,一般使用如下形式的注释:
1 | /** |
此代码段中对ADC_InitTypeDef这个结构体进行了较为详尽的注释,开头使用@brief说明此结构体的主要功能,之后对结构体中每个成员的意义进行了注释。使用/*!< Comment */这样的语法表示此注释对应的是注释前面的语句,这样可以使代码的排版更为美观。
另外,注意到其中@ref标签的使用,这代表交叉引用。如@ref ADC_Resolution,实际会生成一个超链接指向之前定义的ADC_Resolution模块。这里的交叉引用可以为模块名、函数名、结构体等。
以上代码段提取出的文档效果见下图: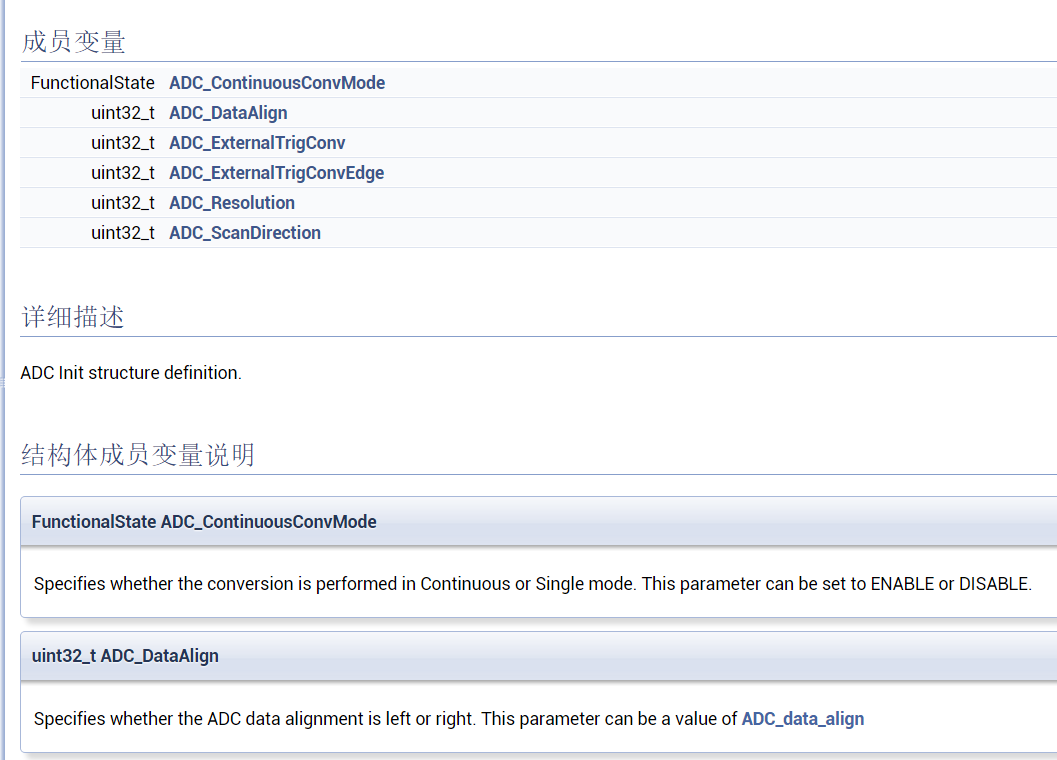
枚举的注释形式与结构体完全相同,可参照以上示例进行注释。
函数注释说明
函数的注释说明一般放在源文件中,头文件和源文件中最好不要重复添加注释,否则生成的文档会有重复。函数注释一般使用以下的形式:
1 | /** |
使用@brief简要说明函数的作用;使用@param说明输入参数,若输入参数是有限的几个值,可用@arg进行列举;使用@retval说明函数的返回值。另外,一些需要特别注意的地方可以使用@note,@warning进行说明。
以上代码段提取出的文档效果见下图: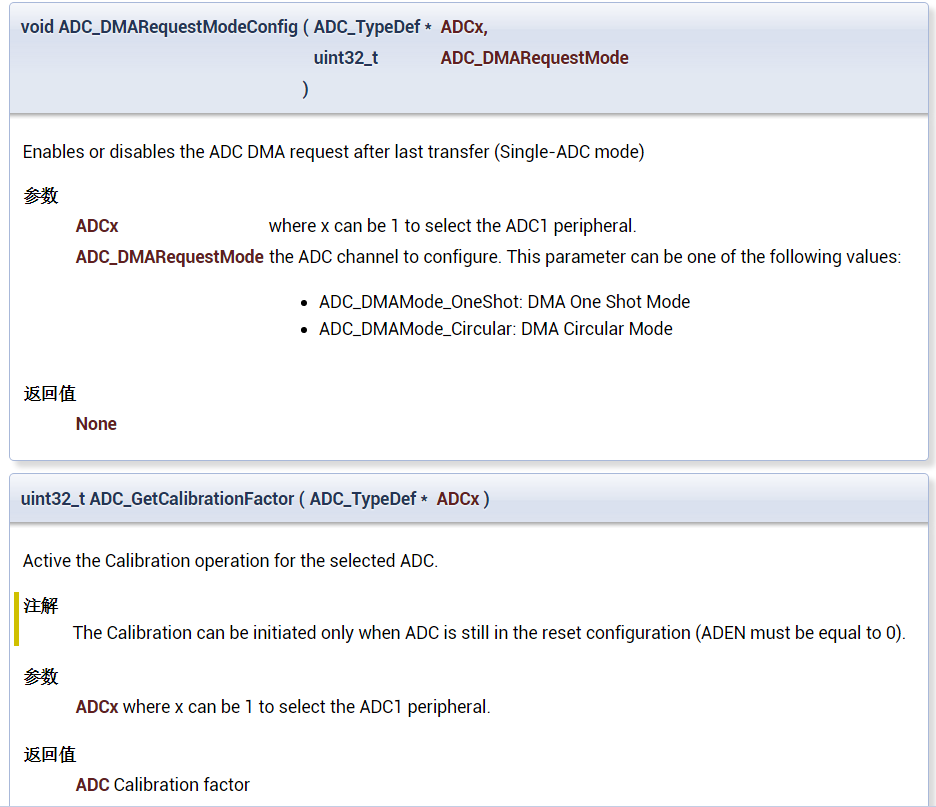
文件头
每个文件的开头部分一般都需要添加一个对此文件的说明,可使用如下格式:
1 | /** |
杂项
使用
@todo和@bug标签列出待办事项与Bug,Doxygen会自动汇总Todo与Bug列表。可使用
@verbatim与@endverbatim包含一段文本,这段文本就会按原样输出。